Prevost Community Forums

Find answers, ask questions, and connect with our
Prevost Community around the world.

  • Upgraded LED Forward Lighting for Prevost XL/XLV

    Posted by Matthew on October 2, 2019 at 6:43 pm

    Greetings from Arizona. I am a new member on this forum and this is my first post. I have owned my 1997 Marathon XLV Coach for a little over (3) years. I have owned (4) vehicles with HID lighting and (2) with LED lighting. Out west where the roads can be dark and the speed limits are higher the last concern one needs is to out drive his/her headlights.

    I have been disappointed with the OEM late 1980s Ford F-150 headlight solution since I bought my coach. I have driven it with high beams ALWAYS on for almost 50,000 miles. Only (3) times has anyone flashed their high beams at me indicating they felt my lights were too bright.

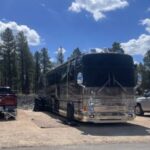
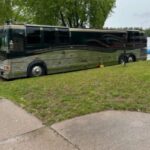
    I have been planning this upgrade for (2) years and only took action in the past 2-1/2 months working on my solution in between trips and services. I have attached a few photos of my renovated forward lighting which includes:

    • JW Speaker 5″x7″ LED Headlights (DOT approved) with high/low beam and polished interior
    • KC Hi-Lights 4″x6″ LED driving lights (DOT approved) to replace the in-bumper Bosch lights
    • Sylvania ZEVO Amber LED market & turn signal lights

    Goal number one was improved forward lighting with emphasis on low beam driving using only DOT, street legal LED lighting products. Goal number two was maintaining the aesthetics and integrity of the original Prevost XL/XLV front “curb appeal”.

    The only rectangular aspect ratio lighting that met my needs was the JW Speaker which have recently been upgraded to a version 2 with “Dual Burn” (simultaneously illuminating the low beam when the high beam is activated) and also comes in a version that has a heated front lens element (as needed) to melt snow and ice (not an issue here in AZ).

    Mounting the lights was the challenge. I used a 5″x7″ headlight bucket to secure the JW Speaker headlights while allowing for 2-axis alignment. I used only factory mounting points to secure my new sub-frame (formed from 16 ga. 304 Stainless Steel) to the coach. This sub-frame perfectly supports the headlight bucket. The bucket then supports the new 5″x7″ headlight. I fabricated a custom fascia/trim out of the same 16 ga. 304 Stainless Steel that I polished to a mirror finish to match the coach. My original concern was the light being too small in the void left by the old Ford pickup truck light, but the polished stainless steel really helps integrate the new, smaller light to the overall coach front elevation.

    The in-bumper lights are a must-have addition to this solution in my opinion. Since the 5″x7″ led headlight has (3) projection elements (1 used for low beam and 2 used for high beam) the low beam benefits greatly by the augmentation provided by the driving lights. Please keep in mind that driving lights are typically wired to be on with the high beam so this gives the driver (2) options:

    1. Wire them to be on with the high beam circuit and aim them further up to provide more long-distance illumination as well as toeing them outward to provide more illumination to each side.
    2. Because these lights have a sharp horizontal cutoff, they can be aligned like the headlights so that the horizontal cutoff does not blind traffic directly ahead. Likewise, they can be toed inward to keep this illumination in one’s lane eliminating the blinding of oncoming traffic.

    I used a 4’x8′ piece of drywall, a sharpie, a tape measure, and a laser level setup in front of my coach to precisely align the lights. This could have been achieved by using a wall but I didn’t have a wall with a level surface in front of it to utilize at my home. The alignment was perfect on the first attempt.

    My night driving test drive into the darkest parts of the desert north of Phoenix was proof that for my driving I picked the better of the (2) options above (option #2) for my driving style. Driving down the highway with no ambient lighting, the low beam by itself is very good exceeding the halogen lights of modern cars with ease. When activating the in-bumper driving lights the “column” of light that illuminates primarily my lane from in front of the coach out to 1/4 mile ahead is impressive. The headlight provides a wide enough coverage on low beam with the in-bumper driving lights lighting up everything you need to see within the reaction time and stopping distance of the vehicle at highway speeds.

    Flipping the high beams on with the driving lights still activated provides the highest level of street legal light output I have ever experienced with no weaknesses perceived in the foreground (zone 1), middle ground (zone 3), and long-distance (zone 4). I can’t wait for the next opportunity to drive at night. When I do I plan to take my GoPro and film various road conditions using the lighting solution I installed. I’ll post that video when it is completed.

    While you will have to take my word on the night driving improvements offered by the 10x increase in lumens – all precisely aimed using DOT street legal lights, I do value your opinion on the look of the final product and its aesthetic integration with the front of the coach.

    Drive Safely!

    Archived replied 7 years ago 11 Members · 11 Replies
  • 11 Replies
  • joel

    Member
    October 2, 2019 at 10:13 pm

    NICE job MATT.


    1999 XLV X-6872,  liberty #440
  • Ronald

    Member
    October 3, 2019 at 8:23 am

    Nice job, great looking XL.

  • Matthew

    Member
    October 3, 2019 at 8:54 am

    Fabulous job, and I bet a lot of owners would like to buy a kit.

    What is the device with the wire going to it aft of the front bumper?

  • Jimmy

    Member
    October 3, 2019 at 9:18 am

    Make and sell a kit. There are quite a few of us that would be interested.

  • George

    Member
    October 3, 2019 at 1:41 pm

    Best solution yet. Looks good, and with the use of the 5×7 standard lights, a later technological upgrade becomes easy. I’d love to have a kit.

    Did you make any provision for DRL’s?

  • Archived

    Member
    October 4, 2019 at 7:28 am

    Impressive job on the surrounds! Do you have any pictures of the subframe that you made to mount the headlight bucket to?

  • terry

    Member
    October 4, 2019 at 2:24 pm

    Thank you to everyone for the positive feedback on my one-off forward LED lighting upgrade. Based on the overwhelming interest in this solution, I am pursuing the creation of a self-install kit of the highest quality. The bar is set high by Gil Johnson with his excellent rear LED upgrade kit which evolved over several iterations in his quest for the perfect solution. I want my end result to be of equal quality in design, fabrication, finish, and user experience (both for self-install and long-term use).

    I am ordering a set of the newest version of the JW Speaker 5×7 LED headlights to swap in (the ones I own today are the first generation). After receiving these I plan on filming a 4K night driving video with my GoPro showing the quality of the lighting solution using the current generation of the JW Speaker 5×7 LED headlights. If people are excited about the daytime photos they will be even more excited by the night driving videos! That is the main reason for the upgrade.

    I am working with a local resource to do a high-resolution laser 3D scan of the front of the coach with and without the factory headlight bezels along with the bezels themselves. If I have time I will also have a full 3D scan of the coach exterior performed to help with future upgrades. I might be the first to have a full 3D model of the XLV since the technology didn’t exist when the coaches were built. I am also searching salvage yards for a pair of front headlight bezels even if they are all scuffed up to have a second set to use for setting tolerances. The only risk I have in repeating this in a production process is the potential deviation between parts installed by Prevost. The tighter their tolerances are, the tighter mine can be.

    I will use AutoDesk Inventor to fine-tune my design in a 3D model including tolerances, gaps, etc. This will be used to create production ready parts that can be sent to my fabricator’s laser cutting table that will do most of the work (on pre-polished sheets of stainless for the final trim/fascia), before the parts go through the forming/welding/assembly steps. This will cut down production time significantly, but will require certain minimums to minimize waste.

    I am also working on volume discounts and price breaks for the fixtures from the manufacturers or their master distributors.

    I will keep this thread updated as the process of creating the kit develops.

  • Dick

    Member
    October 4, 2019 at 2:45 pm

    The device on my bumper was already in place when I bought the coach. It is a temperature sensor that measures road surface temperature and outside ambient temperature. There is a digital LED gauge on the dash console that gives me both temperatures which is helpful when determining icing of roadway surfaces. Not as useful here in Arizona, but this coach spent its life primarily in the Pacific Northwest.

    My coach also has instant snow chains activated by a dash toggle. When activated snow chains are deployed to the drive axle. This is found on snow plows, trucks, and buses driving in northern climates. You should look at the videos on YouTube of them in action. I also have a full set of snow chains for the remaining (4) corners. I don’t know how many others have this feature so it is another unique characteristic of my coach.

  • Art

    Member
    October 4, 2019 at 2:56 pm

    Do you know who manufactures that ambient air temp/road surface temp gauge? Interested. Thanks!!!

  • Mark

    Member
    October 4, 2019 at 11:04 pm

    @ joelselman – The Prevost DRL lighting consists of a reduced DC voltage output sent down the low beam circuit to illuminate the stock halogen light at a slightly reduced output whenever the vehicle is in motion. I haven’t put a meter on it to determine what the voltage reduction actually is, but I can tell you that the JW Speaker supports a wide voltage range of 9-32 VDC and when engaging drive the LED light illuminates with the DRL voltage. Of course the LED does not dim like the halogen will so it stays at the same consistent brightness as when the low beam is activated. My instructions packaged with the light indicate that in Europe there is a red wire used for the position light (a small LED in the middle of the light fixture that is required by laws overseas). One of the reasons I delayed so long before starting the fabrication was the fact that I was trying to find a commercial grade “eyebrow” type LED with a bi-color feature that could serve as a DRL and when the turn signal was activated switch to flashing amber. You may have seen this on the road on cars like the Dodge Charger and several others.

    @ Dick in Wisconsin – Thanks to your question I now know more about the system installed by the previous owner (probably at Marathon in OR) located next to the bumper on the driver’s side. It is known as the RoadWatch Sensor Kit. According to their website:

    The RoadWatch sensor measures both air and road surface temperatures (in Fahrenheit) and sends to winter road maintenance equipment as commonly used on salt trucks and gritters.

    http://www.roadwatch.com/product/sensors/roadwatch®-sensor-kit

    The dash gauge is shown on another page on their website which states:

    When connected to a RoadWatch sensor, this display provides easy to read air and road surface temperature information to the operator. Features include a caution light which will illuminate as the road temperature approaches freezing and high-contrast LEDs with auto-dimming to provide better visibility based on ambient lighting.

    http://www.roadwatch.com/product/displays/road-watch-temperature-display

    I can attest to its functionality. I have driven in freezing conditions (crossing the Rockies on I-70 and up in Flagstaff) and have watched this gauge with great attention to the dropping air temperatures compared to the road temperatures to know if the road is holding heat and remains above freezing even though the air is below 32F or alternatively if the road is at or below 32F even if the air has warmed up. A small warning LED illuminates when it gets close to 32F.

    Even during the heat of summer I use the road temperature as a comparison to the changing temperatures relayed by my TPMS system.

    I see the one in the link above looks “shiny” compared to my being painted or dull. Perhaps it is aluminum and in need of some buffing.

  • Bill

    Member
    October 5, 2019 at 7:20 am

    These LED headlights are available from Parliment Coach in FL. They cost $2000 installed or I believe you can send your headlight frame to them and they will return the upgraded part for self-install for around $1300. It looks like your setup would likely cost much less and provide much more light. I do need new driving lights so I hope to be able to make a direct connection with the info you provided.

Log in to reply.