Prevost Community Forums

Find answers, ask questions, and connect with our
Prevost Community around the world.

  • Teflon Lined Hose Repair. Need Your Advice

    Posted by Davy on January 3, 2012 at 1:08 pm

    I posted this in a couple of other forums and then I was told about this new Prevost Comunity. I have a whole lot more information than I started with but any help would be appreciated.

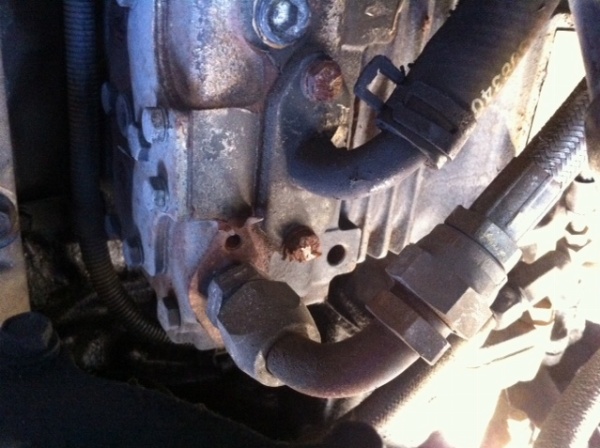
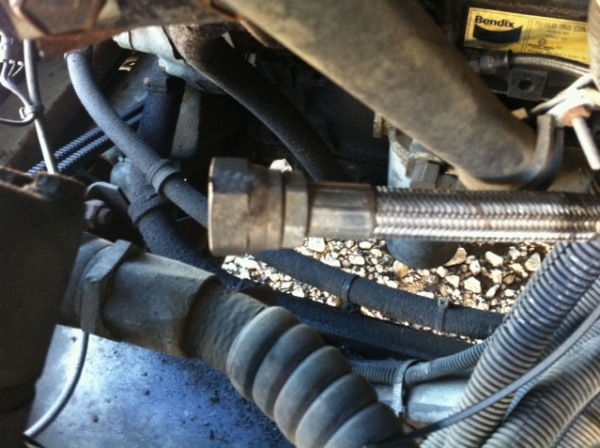
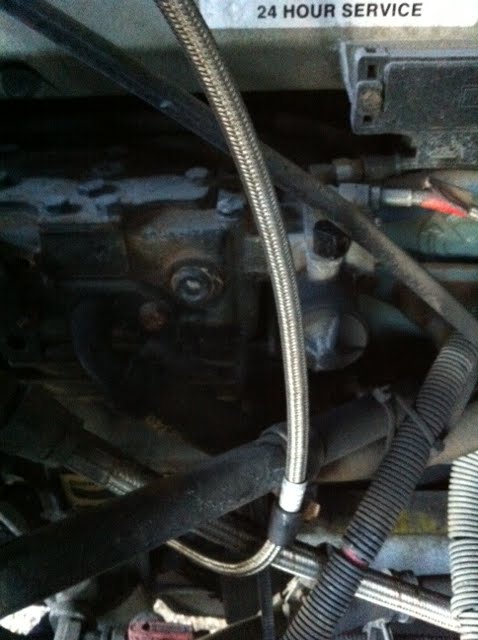
    I started losing air pressure and discovered two hoses rubbing together. Each had a hole. The small hose going up and down in the picture below is an oil line and I had a coupling installed in it at Hose Specialties in Ardmore, Oklahoma. The air line going left to right is another story. It is 10-12 ft. long and goes from the compressor to the air dryer in front of the drive axle. This is on the compressor end and on the passenger side of the engine.

    To replace the hose at Prevost requires 4-6 hours plus the cost of the hose. It will be some where in the neighborhood of $1000.
    I needed to move from Wynnewood, Oklahoma where I first discovered the leak to Blair, Oklahoma so a friend applied the yellow pacth below. Believe it or not, it held the 150 miles over here. It started leaking more about the time that I arrived and began to park.

    Bill at Hose Specialties in Ardmore that fixed the small hose couldn’t repair the big one. He has the capability to repair it on his bench but not in place. He and several other guys believe it can be fixed in place either with a coupling or a ping tank. I am wiling to go for that.

    Maybe you can see in the picture the hole is only a few inches from the fitting at the compressor. I can take that and some clamps loose and get some slack, pull it over the batteries to get a tool in place for a repair. I need to find some one with the right tools and know how to do it. Even if I could find the tools to do it I would not attempt to do it myself. If this is messed up then I would be dead in the water.

    I plan to call and visit some tractor, truck and hydraulic repair shops locally to see if they can do it or recommend a good local service. I will be here two weeks then plan to go through OKC and Tulsa on my way to the other side of Joplin, Missouri. I “might” be willing to attempt a fresh patch and try to limp it along to somebody on my route if I can not get it fixed here.

    Any more ideas or information would be appreciated.

    Keep in mind that I can not remove it and it is a Teflon lined hose. It is not rubber inside the metal mesh and “a piece of copper with some hose clamp and forget it” will not work.

    DKO

    Archived replied 14 years, 9 months ago 7 Members · 14 Replies
  • 14 Replies
  • Tom

    Member
    January 3, 2012 at 2:12 pm

    DK,

    I would think an air/hydraulic hose place could cut the hose where it’s leaking, make a new short hose piece from the compressor and then couple the two together. Since your able to get at the hose where it’s leaking, it doesn’t sound like a really big deal as long as it’s done properly with maybe Airquip or some other supplier with the correct fittings.

    If your in a bind and can’t find any help, you may try Rescue Tape to get you to a place that can help. You would probably have to cut back the braid so the tape would be on the hose.

    Keep us posted…

  • John

    Member
    January 3, 2012 at 2:23 pm

    The one in question is aprox 5/8 inside diameter less than 1/16th thick teflon/plastic od is 3/4 including stainless braiding. hope this helps your hose guy. don’t see why a 5/8 barbed fitting would not make repair. Aero quip would be permanent repair. The stainless steel in this case has a protective function. Best of luck Bob You don’t have enough slack in it that you could just cut it off and put the end fitting back on it???? might be seeing picture wrong.

  • Larry

    Member
    January 3, 2012 at 3:42 pm

    Yes, That is possibly an option. It has room to be re-routed some. I’m ignorant… Can the end fitting be taken off and moved over to the new end or would it have to be pressed on or something?

    DKO

  • Bob

    Member
    January 3, 2012 at 4:19 pm

    Here are a few more pictures with a little better perspective…For some reason they came through a little big so you might have to scroll side to side to see it all.

    DKO

  • Bob

    Member
    January 3, 2012 at 6:48 pm

    you have enough slack looks like you just need a new end to attach to compressor. inside crimped area inside hose is barbed fitting. the grimped piece holds outside tight against it. If some shop there had outside part (simular to a can) they could reuse inner part and field crimp the old fitting in place. I know it doesn’t help but I have the tools to do hoses and sleeves as part of everday use. I am hobby guy not in business!.. would just cut line and grind sleeve off being careful not to get into inside barbed fitting. Might even get lucky enough in this case and actually screw inside barbed fitting out of hose without cutting. Would still need outer sleeve and either hydraulic or hand crimper.. The cheap hose clamps will not last long. Our local welding tool supply has the outside sleeves and mechanical clamp tools.

  • Archived

    Member
    January 4, 2012 at 9:37 am

    Wish I were close by….

  • Archived

    Member
    January 5, 2012 at 7:44 am

    DKO,

    On my previous coach I repaired hydraulic hoses so as you can imagine I was dealing with steel braided hose with virtually no flex to the inside diameter and very high pressures.

    I went to a hose shop and they had hose fittings that were of multiple parts. There was an inner part whose size was specific to the hose, and an outer collar that was wrenched in place to compress the hose to the inner part. It required two wrenches and some grunting to get the fitting attached, but the connection was leak free.

    I used a die grinder with a cutoff blade to cut through the hose. Shears, bolt cuters and any other cutting devices either made a mess or were useless.

    I am sure you can cut the hose at the leak and use a connector or a pair of fittings to resolve the issue and never have to remove the hose from either the compressor or air dryer.

  • Bob

    Member
    January 5, 2012 at 9:31 am

    You did a great job! That let the guys see exactaly the problem. I’m working on posting even simple pictures. So while I could fix your hose I couldn’t post the picture. I know the basic steps and am working on it. The light will come on some day. Happy bussin. Bob

  • Bob

    Member
    January 5, 2012 at 11:27 am

    Bob,

    If you have trouble posting pictures let us know. In fact post it and we can make the response a show and tell for anyone that needs assistance. I am sure we all would like to see your photos because as owners we get ideas for improvements, upgrades, or just better ways of doing things from other owners. It doesn’t matter if a coach is new or being converted from a former seated coach. We all can find things we would like to make better. When I say that I am thinking of your split AC units and your interior lighting and ceiling as examples.

    If you learn how to post pictures I can predict we will wear your out wanting to see how your creative juices are being used to outfit your coach.

  • Bob

    Member
    January 11, 2012 at 2:09 pm

    Bob (robertglines1) sent me a piece of the proper hose, a reusable fittng and a coupling. Most of the people I talked to before had never seen the hose so having a length of it and a fitting really helped. I made the rounds today in the communities where I am located this week and thought I would run some of it by you all.

    After chasing leads all over town and meeting some fine and helpful folks I finally made it to the guy everybody recommended. He knew exactly what I had in my hand when I walked in and knew that it came from my compressor. He didn’t handle the hose or fittings but knew where to send me.

    He sent me to a rental place that had hose, fittings and the knowledge to go with it but everything he handled was smaller than my hose. He sent me to the number one diesel mechanic in the area. I showed him everything and told him Bob’s idea of coming off he compressor with a longer piece of pipe and connecting to the reusable fitting that Bob sent to me. He liked that idea but he wants to use black pipe. He says the fitttings on the compressor are standard 1/2 inch pipe thread and he thought black pipe would be best. His mobile guy is unavailable but if I can get it in Friday he can fix it.

    Any thoughts? I reminded him that once he cut that hose I am dead in the water until it is fixed and he said it would be no problem to fix. I want to be sure so I am bringing it back to you guys.

    Should I allow him to do that?

    Should I wait until I get to OKC, Tulsa or Joplin and get some one else to do it?

    Should I find another re-usable fitting and put in on the short piece of hose coming out of the compressor and couple them together?

    Any other options?

    I posted a couple of pictures below…

    DKO

    This picture rotated when I brought it over but you can see the elbow coming out of the compressor and then connecting with the hose. The leak is 4-6 inches down the hose.

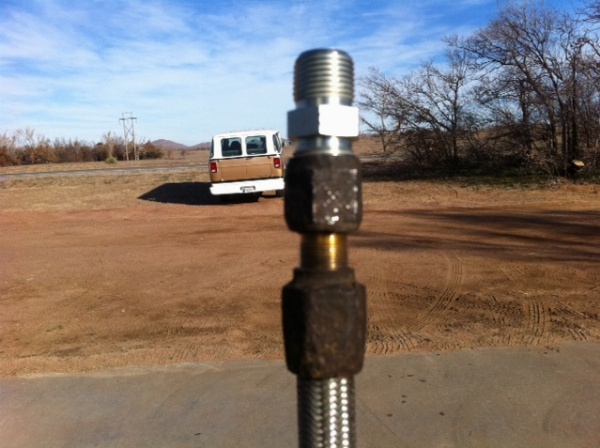
    The hose, reusable fitting and coupling that Bob sent to me…

  • john

    Member
    January 11, 2012 at 7:24 pm

    Sounds like the black pipe deal will work, but I’m not familiar with the pipe. If it’s a rigid pipe, I would be concerned about vibration and flexing unless it’s well supported.

  • Archived

    Member
    January 13, 2012 at 5:03 pm

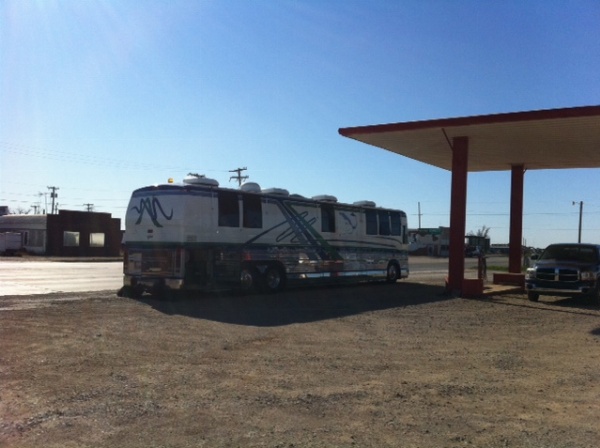
    I took the BoggsMobile to Altus, Oklahoma (About 15 miles from where I am) today and had the air line fixed.

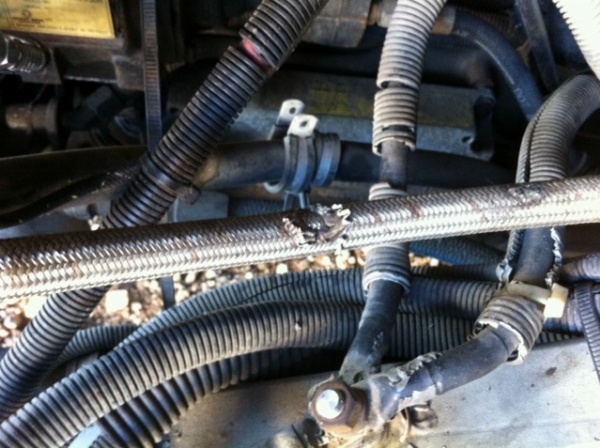
    The plan was to use the reusable fitting that Bob sent and either use a union and another reusable fitting to couple where the hole was OR come out of the compressor with a longer pipe and connect to it. Turns out he did neither. The air line was previously was routed under and hard against two ground wires and moving it above them gave us plenty of slack as Bob and others thought it would.

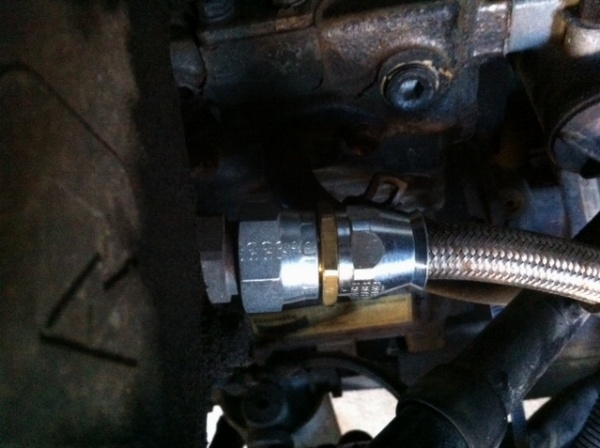
    By doing that and using an Aeroquip reusable fitting the mechanic was able to hook directily to the elbow coming out of the compressor. The female end on the Aeroquip fitting screwed directly on the to existing fitting. It was perfect.

    The old fitting. The hole where the new fitting was installed is about 4-6 inches from this fitting.

    New fitting hooked to the compressor…

    The air line was routed under these two ground cables and you can see where it rubbed. The “stuff” you can see is actually from the plastic wrapping around the ground cables and the air line appears to be in good shape. I may wrap some of the air line with rubber heater hose in places where it comes any where near other lines and hoses.

    While this fixed my air leak I believe I may have other leaks. Tomorrow is a travel day so next week if it is not too cold in Missouri I will investigate and perhaps be back with more questions.

    Thank you all so much. robertglines1 (Bob) went way beyond the call of duty and to you sir I give double honor! Thank you very, very much.

    God bless,

    DKO

  • Archived

    Member
    January 13, 2012 at 5:12 pm

    Glad your all fixed up and rolling..

  • Archived

    Member
    January 13, 2012 at 7:18 pm

    DKO,

    To say you may have more leaks is an understatement. I am not picking on you or your coach, or on anyone’s coach for that matter, but maintaining air system integrity on an older coach such as mine or yours is a challenge that requires patience and effort.

    The good news is once you have a leak free coach (Hector, our most knowledgible pneumatic guy around has a leak free coach) you will be rewarded with a lot of benefits ranging from almost zero aux compressor operation to a coach that does not lean, to a right to brag about your lack of leaks.

    It takes a real Dick Tracy to hunt down and fix leaks and there are many ways to find them, some easy, some less easy, but the bottom line is maintaining that leak free coach then only requires occasional effort. Glad you are back on the road and perhaps all of us who have chased air leaks can share how we narrowed the quest starting with “the low hanging fruit” (Hector’s term) and reaching the point where the most minute leaks were located using a bubbler.

Log in to reply.