
-

Here is where to find the Level Low webinar.
https://prevostevents.webex.com/mw0401l/mywebex/default.do?siteurl=prevostevents
As to the stands, I had two production runs of stands made and they are simple but get the job done. They were 4 X 4 steel tube, 3/16 thick. They could just as easily be made of schedule 40 or 80 pipe. The length is from the bottom of the body support points to the floor, minus about 1/4″ when the bus is fully raised on the air bags.
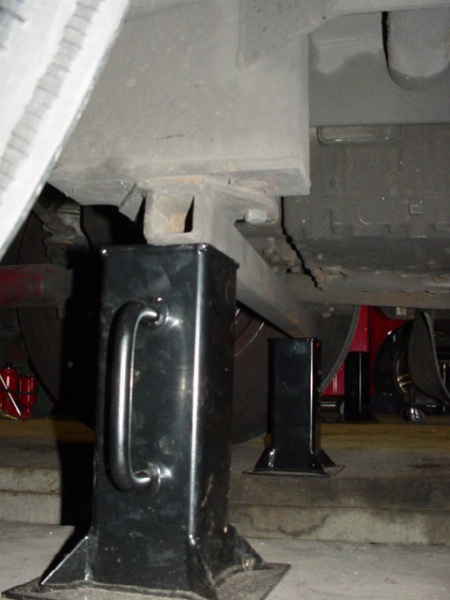
These are at the rear
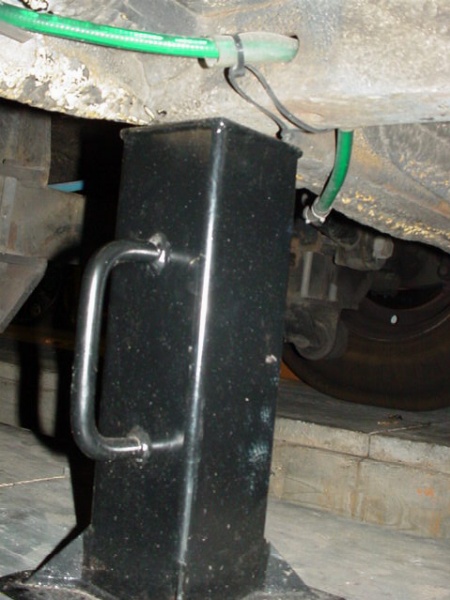
These are at the front.
But don’t be afraid to use heavy wood blocks or a hydraulic jack that you can put under the support points with the jack all the way down and the center adjustable screw turned up as necessary. Never trust a hydraulic jack that you need to pump up.
-
Great, thanks Jon
I’ll be working on it again this weekend.
-
Jon: Are the stands the same height for the front and for the rear? Do you use just four then? (I don’t own a bus yet.) Thanks! Dick
-
The height of the stands varies front and rear, and also based on the model shell. It got too complex trying to sort out which was which so I stopped doing the production runs of them. Anyone can create their own, they just have to measure the required height for their particular coach and find some scrap pipe or tubing.
-
Dick,
The link shows the photo of stands, but it also show part of the rope lighting threaded through the frame in the front.
-
I replaced 3 Norgrens today. I figured out by Jon’s instructions, and the schematic of the pneumatic system that the 5 port valves control the air bags, 1 per side. My passenger side was leaning, I am waiting till morning to go out and verify that it’s fixed. BUT, I suspect that the drivers side may be trying to creep down now. I only had 1 5 port in my shop, so I’ll order another one Monday.
Will report back tomorrow with results.

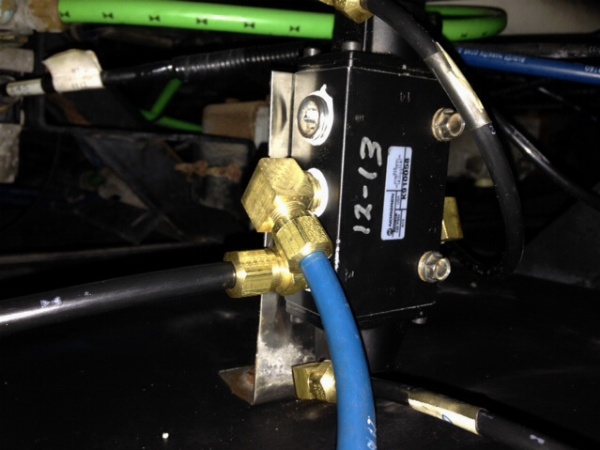

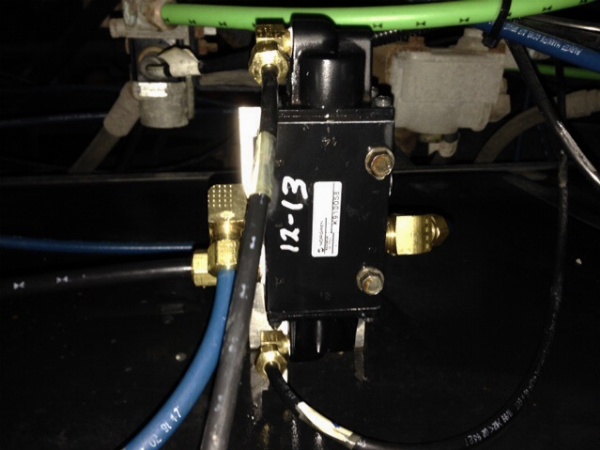

-
Nice job Jerry, I did all 9 of mine a month ago it’s worth it ,, mine was not leaning but I did it anyway ,, all my air bags are new with in the last year and half so I am good there ,, also did all ride height valves to, and brake chambers all worth it good luck…..
-
Jerry, I hope you changed out those push in fittings for compression. They have proven to be one of the main sources of leaks as they age.
But great job. From experience I can tell you that no matter how careful I am after I change out air bags and Norgrens I still have to tweak the fittings after the fact to rid the coach of minor leaks. But once it is done and leak free it is really nice to be able to see it remain level for long periods.
-
Thanks Peter,
I’m working towards replacing all of mine too. After seeing how dirty these were inside the valves, I know the others need replacing too.
-
Nice job Jerry, good post with pictures. Nice to have you aboard PC.
AL
-
Thanks everyone for the compliments, BUT, I may not deserve them yet.
Jon, I did replace all fittings with compression style, and I did have to go back and tighten a few of them more than I thought I should have to start with. But, I assumed the plastice pipe may have had some indentions where the push ons were, and most did not have enough length to cut off and have a fresh end. I did add to one with a union to enable a fresh end. I aired everything up with shop air, turned the swicth on, the bus raised up fine. I checked again for leaks, and corrected a few bubbles.
I could then hear a leak underneath the bus, somewhere up high in the center because I can hear it from both sides of the bus. Anyway, it was getting late, so I figured even with Aux leaking, the bus should still stay up.
Before I started all this, the bus was leaning hard on the right rear and right front.
Now, this morning I go out to the shop, and the bus is up in the front and level, but the back is completely down on both sides in the rear!? I put air to the bus, turned the key on, and it raised up level, like it should. So…………I’ll go back to studying the schematic more.
Am I right in thinking that each side on the rear should be separate as far as air supply going to the bag tanks? In other words they are not connected? They go through each Norgren?
I’m sure the leak I am hearing is the clue to the problem.
-
Jerry, if that AUX air leak brought the system pressure down below 30 psi, both sides of the rear of the coach would have dropped when the tags dumped air, regardless of the status of the main air bags. Just a thought…
-
Ron, my aux pressure has always dropped to 0 within an hour or so, but the bus would stay up for a week at least.
I found a fitting blowing bubbles , the 1/4 in line that goes from the system fill in the RR engine bay to the air dryer.
That’s all I’ve found so far.
Log in to reply.