
-

Jerry,
What Jon said… Mine drove me nuts for a week after installing new bags and rear 5 ports and I narrowed it down to the 3 port above the tag that was leaking internally and two 3 ports in the steering bay. You won’t have that setup, Liberty modifies the system. So you can have a rear leak, one side or the other and the problem can actually be up front. One thing that helps in understanding the suspension components is to blow up your pneumatic drawing to 24 X 36, then it’s much easier to sort out. I color coded the accessory and air lines on the drawing making it simple to follow the lines.
-
I did all my brakes ,norgrens ,ride height valves ,check valves ,tank drains , air dryer , pressure protection valves , gauges comp fittings.. The primary and secondary gauges still went down drove me nuts ,,, it was the tag valve and park brake valve I put new ones all good now , And I put all comp fittings on coach not one push in fitting left
-
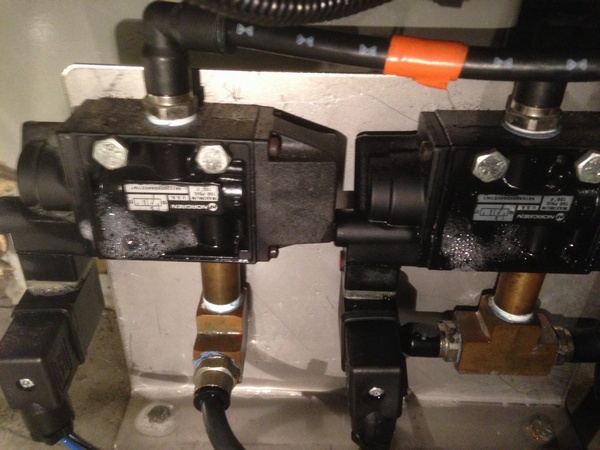
When I look at the photos Tom posted I think of Don Ho……….”Tiny bubbles”
Those leak showed up with soapy solution. Not all will show up and leak detection is difficult and time consuming and requires patience. But if you use a device like Hector’s Texas Bubbler or a device that Prevost shows in the suspension system webinar you are likely to be able to isolate even the smallest leak. Just understand to do so you have to start at the head of the line and go downstream one fitting and device at a time until you have reached the source of the leak. There is no simple way.
-
Yep, those tiny bubbles did not get picked up with my electronic stethoscope.
-
OK guys, I am really having fun with this.
I replaced the leaking ride height valve, and went out this morning……..leaned over again.
Now, I can hear a leak that sounds like its coming from the area of the air dryer, I can see it with a flashlight, and sprayed it, but no bubbles. There is a tank above it, but I can’t get to it.
I may drive it up on my ramps this weekend and look for it. Or, I could take the drive tires off, and maybe find it from there. Still have some Norgrens to replace.
I’ll get it…….ain’t giving up!
-
Jerry,
The ride height valves have nothing to do with the leans. If you want to start chasing your cause of the leans go through the articles section and review the numerous articles that talk about the pneumatic system. If you can look at Hector’s power point program and the Prevost webinar relating to the suspension.
I won’t suggest chasing the leans is easy, but I can tell you that it is possible to narrow down the area of the search for the leak significantly so it is quicker to find.
This is just my philosophy, but when my suspension system reaches its tenth year I pull all the Norgrens, air bags, and push in fittings and replace everything with new. The fittings get changed to compression. It is a whole lot easier doing that than attempting to cure the leans on a bus with old components. You end up driving yourself crazy because on old parts the leaks can show up anytime and the fact you have a leak somewhere means you may fix it, only to have another leak show up somewhere else.
-
Jon,
You are right. The bags were replaced 2 years ago, and they were inspected by Prevost in April, plus I have sprayed all over them and don’t see any leaks.
So, I will continue replacing valves and fittings.
The reason I thought the ride height valve was contributing to the leans, was, it was blowing bubbles out of the exhaust tube with the bus sitting still in my shop, and on the side that was leaning.
I’m learning……….
-
Jerry, here is another tidbit. You cannot see bubbles blowing from an air bag leak if it is in the bottom of the can, or the seal between the can and the rubber portion because the piston (the base the bag rolls over) blocks the view and the ability to get the leak spray to the point where the leak can occur. To check individual air bags you have to remove the supply line to either all of them or just one of them and pressurize the air bags at that point using Hector’s bubbler, or the air gauge set up Prevost shows in the webinar.
The greatest probability of a leak is going to be the three port between the tag and drives, or the five port and soapy solution may not reveal the leak.
This is one reason when I start to get the leans or my parts are 10 years old I just bite the bullet and replace everything. I spend more time chasing leaks than I do just replacing parts. Assuming the new parts are leak free then when I am done I just have to check all the fittings. But on several occasions I have found new parts that do leak. Fortunately that is rare.
-
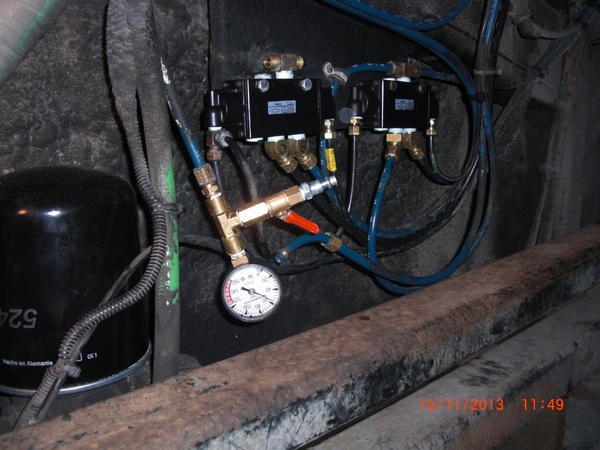
Yep, ya have to isolate the 3 bags and you’ll find the leak. Starting with the 5 port line to the front drive bag, then the rear drive bag and finally the tag bag. I knew I had a bag leaking, but there was no way to soap it enough under the fold to see the leak. Only by apply air pressure and watching the gauge over a few hours did it surface. Be sure to hook your gauge before the ping tank, that way if there is a leak in the tank, it will show.
-
Tom, is that a schrader valve on your guage, can’t quite tell by the picture. Is that where you air it up?
Jon, I’ll start with the 3 ports, since the bags are not that old, and the Norgrens appear to be original. I’ll just have to determine which ones go to which side, and start with the leaning side first, since all of mine are on the same side.
I found my Pneumatic drawing today, and had it blown up. I have several schematics that says (OPT. Front Kneeling with rear LOW-BUOY Combination) What does that mean?
-
By using an on-board air compressor and air bag suspension, the kneeling bus can drop to a much lower position when loading and off-loading passengers. By depressing a button inside of the bus, the operator is able to release air from the front air bag suspension. This allows the kneeling bus to slowly drop down from its normal ride height. Once the passengers have made their way on or off the bus, the switch is released, and the suspension once again fills with air. This brings the kneeling bus back to normal operational height.
Taken from a bus site and reposted.
AL
* Another situation of bus kneeling happens when Liberty buses kneel requesting passage by a parked Marathon.
-
That’s the male end of a air chuck to hook to air line from compressor to fill air line then shut ball valve off to keep air in line to see if it leaks …. Hope that helps . Tom maybe will chime in here!!!
-
Peter, I see now, it’s a male air chuck.
I was looking on my phone before.
-
Jerry,
If your bus leans or settles in the front the place to look is limited to the air bags, valves and fittings that are associated with that particular area.
Get that pneumatic diagram http://prevostparts.volvo.com/technicalpublications/en/pneumatique.asp and get it blown up so you can see the detail. The diagrams are coach specific and the best part is that the way they are drawn is a pretty accurate representation of where and how the various parts are located. That way you can visualize what parts of the suspension you should focus your attention on. The diagrams are so accurate pictorially you will even see the orientation of the various fittings so if you start checking the air bags for example you know which line on the 5 port Norgren to remove so you can pressurize from that point back.
I know this has been said before but I am going to reinforce it. DO NOT EVER GET UNDER THE BUS, EVEN FOR SHORT PERIODS UNLESS IT IS SUPPORTED AT THE CHASSIS SUPPORT POINTS. The previous statement is vital for everyone to understand, and especially when working on the suspension.
When you get the pneumatic diagram, go to the Prevost shop manual for your coach also available through the publications page and in the suspension section it provides more detailed information, and one thing you may find very valuable is the short explaination of which solenoid valve in the 5 valve manifold controls each suspension function. That information will make it much easier to develop an understanding of the pneumatic diagram. Supplement that with the webinar and soon you will be on your way to finding the leaker.
-
Where is the webinar again?
Are there suitable stands that you can buy to hold the bus up, or do I need to make them?
Log in to reply.