
-
LED side marker/turn signal lights
Posted by DON on October 12, 2015 at 5:07 pmRed=M8-R8; Amber=M8-A8; $8ea + $11 shipping. A real PIA to install


Chris replied 11 years ago 8 Members · 12 Replies -
12 Replies
-

The originals are held on w/4 screws(2 inner, 2 outer). The new LEDs are held on w/2 screws{outer).
Problem 1) A original inner screw provided for the elecrical ground for the fixture. The picture shows my solution for the new LED fixture.

Problem 2) There is a grommet/nut thingie(I don’t know what to call it?) that the outer screws screw into to hold the fixture on. Half of these thingies? failed when trying to tighten down the new LED fixture. My soluton? go to HomeDepot and buy 5/16″ wall anchors(see pic). I also used #10 stainless pan head screws instead of the #12 non-stainless that came with the anchors.

Problem 3) How to seal the new fixture to the side of the coach? I used automotive door edge protector that I bought in bulk(18′) from a wholesaler here for $0.60/ft. It takes 16″ per fixture. Another sealing method is using red rubber gasket material I found at HD, and cutting it to size, because it comes in 6″x6″ squares, 2/pack.


-
LoneStarRace wrote: “Problem 2) There is a grommet/nut thingie(I don’t know what to call it?) that the outer screws screw into to hold the fixture on. Half of these thingies? failed when trying to tighten down the new LED fixture. ”
Those “thingys” are called “well nuts” and are available from Fastenal, probably other places.
https://www.fastenal.com/products/details/11237327 (Not sure if these are the actual ones used by Prevost.)
Our coach has the stainless steel “clamshells” fastened to the coach side that the marker lites “fit” into. I’ve bought some LED lites and lens from Bill the Chromeman to replace the existing lights. He has a little write-up on the subject in this thread:
http://prevostcommunity.com/forum/threaddetails.asp?Category=Chassis&ThreadID=4129
I’ve taken a few of the lights apart to see what is there and awfully surprised what I found. As LoneStarRace describes, the assembly is held in place by four screws. The outside screws were stainless steel and holds the lens onto the base; screw passes through the lens, through the base, through the clamshell into, and into the wellnuts. The wellnuts are neoprene and the screw goes into a brass fitting inside the neoprene which draws up against the inside of the bus shell. So far, so good.
The inside pair of screws were another matter. These screws go through the base, through the clamshell, and into the stainless steel side of the coach and one of the two is also the ground for the light. Bill the Chromeman said the screws used by Prevost cut their own threads in the stainless steel side of the coach (when you get one out, you can see the threads in the coach side). Every pair I’ve looked at after taking the lens off have been heavily corroded, and I CANNOT emphasis HEAVILY corroded enough. I’ve been able to get a few of out.
In some cases there was enough of the (Phillips) head left I could get the screw out. In at least one case the head of the screw popped right off. (Low level panic light started to flash.) The other inner screw on that light came out so I could remove the lite base and SS clamshell and I was able to grab the headless screw sticking out with a small Vise-Grips and carefully turned the screw out (panic light turned off). But in a number of cases the screw head was so corroded that I couldn’t get the screw to move, the head didn’t pop off, and the Phillips grooves in the screw head slowly disintegrated in front of me (but the head is still intact). My neighbor gave me some left hand drills to try on them. Maybe the left hand drills might “grab” the screw and turn it out (maybe at least far enough I can grab it with the Vise-Grips).
So … four screws in each light, two stainless steel and two are regular steel (whatever you call that). I’ve taken two or three clamshells off so far and there is a circle of rust on the stainless steel panel of the coach about an inch in diameter around each of the non-stainless steel screws.
I was really, really surprised (actually disappointed) that Prevost would use non-stainless steel screws for this outside application.
-

Wellnuts, now I know, thanks
Dick, Mine weren’t stainless I didn’t have the corrosion problem u mentioned. Our whole coach is pretty much corrion free
-
I’ll take pictures of the corrosion next time I have one of the clamshells off. What has me scratching my head is that I’ve talked to both the original owner (who had the coach for 14 years) and the second owner who had the coach for 6 months) and with both of them, it was kept inside. So the only exposure to rain, snow, etc. was during the 72,000 miles that were put on the coach over its life.
I would really like to know Prevost’s thinking for using two stainless steel screws and two galvanized (??) screws. A stainless steel screw would provide a proper ground from what I’ve been told.
-
If free iron is transferred to stainless steel rust (corrosion) will begin.
The use of steel screws, even if plated is almost a recipe to begin the process of rusting on stainless steel.
In the metal working business tools and dies are made of steel, but when working with stainless steel it is customary to use protective paper or plastic coating which prevents the transfer of iron to the surface of the stainless. As an alternative the stainless surface could be sand or bead blasted or belt sanded or treated with acid to remove any iron.
The well nuts or inserts prevent direct contact between the screws and the stainless skin so if you have corrosion it is likely because someone modified the original light mounting method used by Prevost, likely Liberty.
-
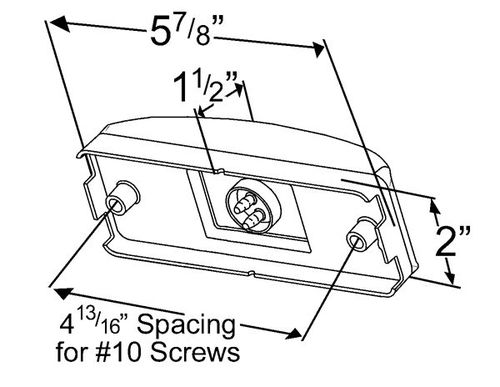
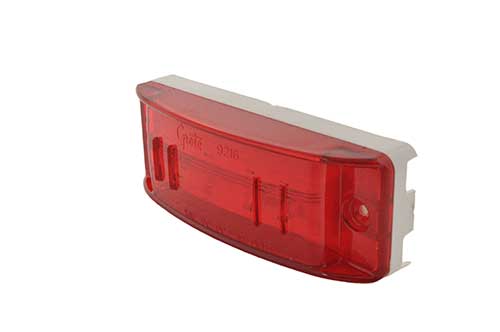
I used Grote #47162 red LED, and Grote #47163 amber, with no installation problems. Plugs in the factory harness on an H3. I understand you have a Stainless bus, but these work great on an H, for those who may be wondering.
Log in to reply.