
-
LED Marker Lights
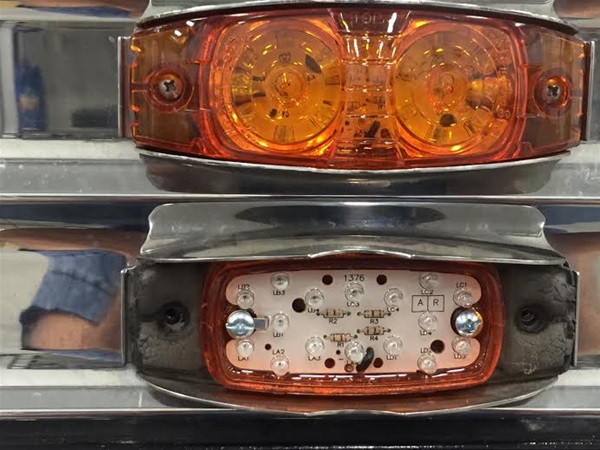
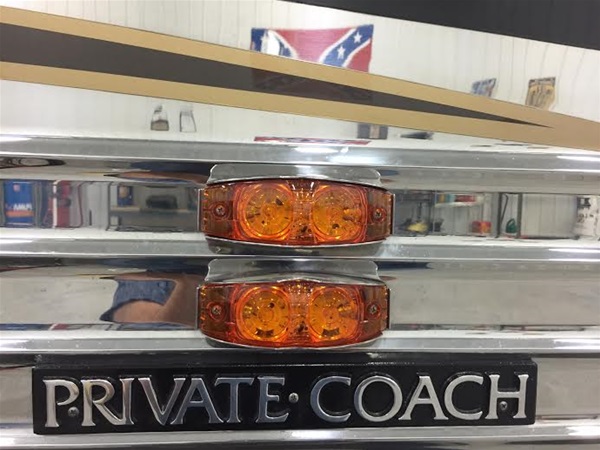
Posted by Steve on November 28, 2015 at 6:41 pmHere I go!! Next project, thanks to Bill Puleo the “Chrome Man” Very
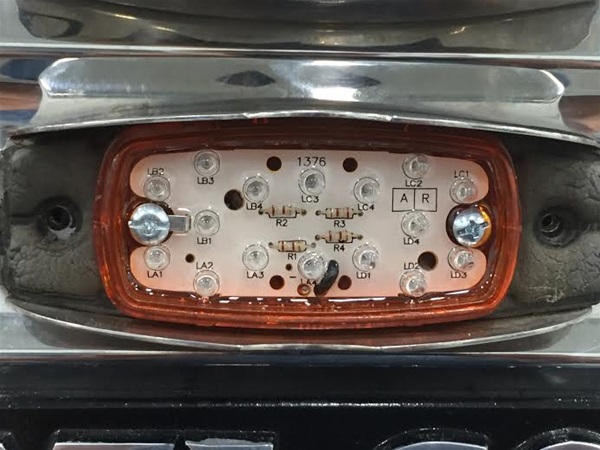
high quality stuff, perfect fit and finish. They are very nice covers
and the LED’s are very bright. The only thing I should have done
different was get new gaskets. The old ones will do for now. The screws
that are on the outside and screw into the well nuts are stainless and
come right out. The inside screws are steel and are threaded into the
stainless panels have almost rusted in two. Use your best penetrating
oil and twist them back and forth before you thread them out. I broke
off a few but were able to get ahold of the screw with vice grips after I
removed the entire fixture.
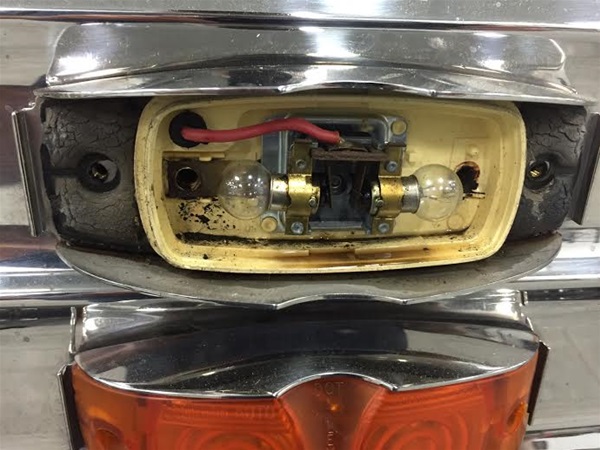
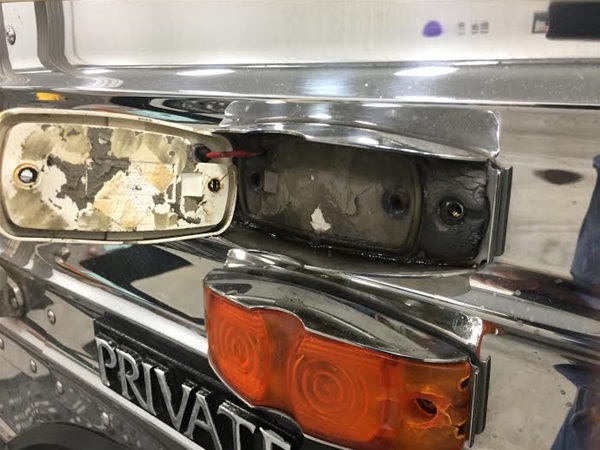
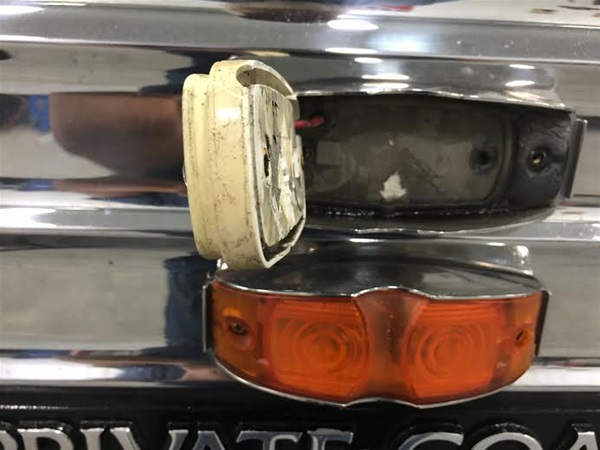
I love it he way they look and how bright they are, thanks again BillPictures to follow, can’t get them to upload on my I-pad
 Archived replied 10 years, 1 month ago 34 Members · 85 Replies
 -
85 Replies
-

Steve, I got the same package from the same Bill at the same time, and did the same procedure. All the outside bolts (8-32) being stainless came out ok. But the inside screws were not all stainless, and the ones that were steel were rusted to the extent you could not even see what kind of head it had. There were 5 of those on the right side and 3 on the left side, I just used the die grinder to take the heads off and did not accommodate a new screw there, counting on the outside bolts to do the deed. Also I tossed all the old gaskets and bought rope gasket at Menards and pushed it into the channel built into the back of the LED only for the purpose of further sealing the screw/bolt holes already full of hardware. Luckily the LED looks factory sealed, so I did not gasket the outer shell at all even though the old ones were. It couldn’t have been for sealing because both ends of the shell have breather holes. All twenty five of the old lights worked without one failure the past eight years, but like the new stuff better, no regrets.
-
They look great!
Are they 12 volt?
Do they wire straight to existing wiring or require adaptations?
Where did you get them?
Cost?
Davy
-
Steve: Where did you get the gaskets?
Steve and Dan: How did you wire the positive wire. I bought the same lights from Bill and when I took the first couple apart on the street/pax side, it appears the positive (hot) wire comes out of the coach panel on the left and the positive wire on the light is on the right. Flipping the light I now had the postive (hot) wire on the light on the bottom and the positive wire coming out of the coach on the top (same end). Neither configuration seemed to have a good place to put the wire behind the light fixture which I’m concerned would lead to a poor seal and possible water intrustion into the inside of the coach.
Also, did you solder and heat shrink? or did you use a butt connector of some kind. Please enlighten me.
Some day I hope to find out why Prevost uses non-stainless screws on the inside pair of holes. I’m afraid to leave them the holes open for fear of moisture getting behind the stainless steel. Our coach spent much of its life for 15 years inside and the corrosion on the non-stainless steel screws is breath taking to say the least. I plan on putting stainless steel screws in the inside pair as well as the outside pair. One of those screws is the ground, I presume a stainless steel screw will ground just as well as a non-stainless steel screw. Its grounding to a stainless steel panel.
HINT, HINT: If I owned any series of XL coach I would check the screws holding the clearance lights and replace any non-stainless steel screws with quality stainless steel screws ASAP. If I was a dealer holding one in inventory, I would also change them out.
I think that Prevost probably put those non-stainless steel screws in there by mistake and they are missing from the inventory in Quebec. I’m toying with the idea of when I’ve got them all out, send them to Prevost corporate (broken off heads and all), and let them know they should put them back in investory.
-
Dick, Steve’s post says he did not replace gaskets.
I tried to minimize the wire between the fixture and the shell but still had to deal with the misalignment between where the wire came out of the fixture and the location of the hole in the shell. By using Menards SKU number 5672543 white rope caulk pushed into the channel built into the back of the fixture, I was able to get a seal away from the shell enough to allow space for the wire.
Yes, solder and shrink tubing small enough to push back through the small hole in the shell.
I installed all new stainless steel hardware and used bronze lock washers on the screws that make the ground.
-
I had the same problem with my inside screws rusting like eveyone of them will do.
The screws on the inside are called thread cutting and I could not find them in stainless.
First tried to use a 8 stainless but if will not thread trough the hole so I just went back with the same screws knowing every year of so they need to be checked.
I guess you could run a number 8 tape of the correct thread pitch through the hole and then use the stainless no. 8 screws.
I think min were 8×32 or 8×24 I would have to check but someone on the fourms did their’s and some of the screws were no. 10’s.
I did not spend a lot of time trying to find the stainless thread cutting screws but they may ne out there some where.
-
Buddy, ironically I could not find the inside screws in stainless that had the correct thread, so I had to go with the self tapping SS screws in order to get the correct thread, and they went in and fit well.
-
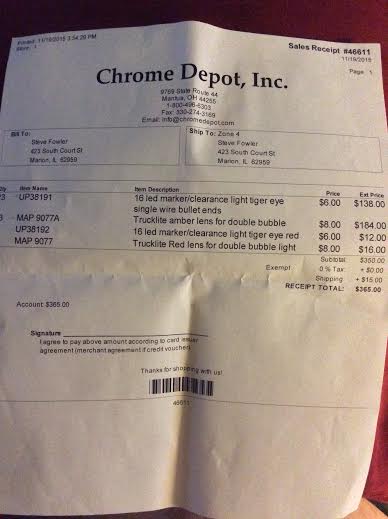
Mornin’
Dan,
All of my old lights worked also and I never lost a bulb either but after seeing Buddy’s gorgeous vintage coach I just had to get me some of those lights!! Just so happens ole Bill was right there to make it happen for me. He didn’t know me from Adam but took my address and sent them too me!! Once I started opening the old ones up, they were in really bad shape. Not only were the lenses all chalked out, the inside fixture was corroded and brittle. It was time!
You also said you didn’t use the inside screws, how did you get ground to your lights? The ones I have have a ground tab that is grounded through the skin.Davy,
Yes sir on the 12 volt, and they fit exactly like they should. The wiring was the same also, the inner light came with one hot wire and had a ground lug on the other. I had to cut off a male connector that I didn’t need. The picture tells you the rest!Dick,
My coach has only one wire “hot” the ground is picked up through the stainless skin. The gaskets looked dried out but they were still soft and flexible. The seal or gasket behind the stainless Prevost light guard was in super good shape so water intrusion will not be a problem. Once I removed the old plastic fixture and pulled out the wire some had 2-3 connections. I cut all of them out and used mechanical butt connectors and shrink tube. Solder makes the best connection no doubt but I have seen where the nokrode or paste has corrode androt the tiny wires in two.Buddy,
I had a couple of the inner screws that were “Wallered” out. I’m not sure that Wallered is a word but you know what I mean. I ran a 10-24 tap in the hole and upsized the screw. I put in galvanized screws, if they last another 15-16 years I’ll be good.Steve
-
I will accept Wallered as a word, cause I have done plenty of it in my 66 years of doing stuff.
Thats what I should have done to get all the screws stainless, but now you have given me another project to do.
Love those lights.
I also replaced all my upper marker lights with LED’s.
Aside from the look of the LED light I really like the new shinny plastic lenses.
Safe travels.
-
Buddy,
Looks like the fun never ends!! Did you get your marker lights up top from Bill?
-
From a trucking parts company but I am sure Bill has them.
Ther were branded TruckLite parts.
I should have called Bill but didn’t think about it.
I will call him on another matter though.
25250R / 25250Y
-
Buddy wrote: “The screws on the inside are called thread cutting and I could not find them
in stainless.First tried to use a 8 stainless but if will not thread trough the hole so I
just went back with the same screws knowing every year of so they need to be
checked.”I bought my lights from Bill when we were at Jeff’s this summer for the seminar. Bill gave me one of those wellnuts used on the outside pair of stainless steel screws along with a “thread-cutting screw”. I struggled to grasp the significant of the a “thread-cutting screw”. Then I remember that the previous year I had removed the lens of a burned out marker light only to find the horrendous corrosion. I got one corroded screw out and ruined the head of the other corroded screw. I tried to replace the corroded screw with 8-32 stainless which appeared to match the threadcount of corroded screw I took out.
When putting the stainless 8-32 screw in, the further I went in, the the harder it turned. So I turned it harder. In short order the stainless screw broke right near the skin of the coach. Then I remembered from previous experience that apparently stainless steel screws are more brittle than regular steel and are prone to twisting off. So not knowing what to do next, I closed the light up using only the outside screws to hold it on.
I posted this problem to the Garage Journal Forum and a couple of posters suggested that I should have put some oil on the stainless screw before I put it in because an corrossion left on the the female threads of the skin caused the screw and the hole to “lock up”. I’m not sure that was the problem. I think its the shape of the threads as Bill was trying to explain to me and I couldn’t grasp at the time.
Apparently there is a differrence in the shape of the thread of a normal 8-32 and a “thread cutting” 8-32. I suspect this is a different animal than a self-taping screw which I think has a much more course thread.
Why did Prevost apparently drill a hole and tap the outside holes for normal 8-32 stainless screw and then drill a hole and use a non-stainless steel “thread cutting” screw? It absolutely defies logic to me.
This has been a helpful thread for me.
-
Dick, what I found was that a non-stainless, non-thread cutting screw had a finer thread than the stainless counterpart. That’s why I had to go with self tapping stainless which has the finer equivalent to what was originally in there as non-stainless.
-
Steve, I did use all the inside screws that I could. Which means I did not use five of them on the right side and three of them on the left side. So out of 40, I did not use eight, but in all cases I could use at least one inside screw on every fixture, so the ground was made the original way, but I used a bronze lock washer under that screw also.
-
Well, I got 10 more on today. Several of the inside screws had the head rotted off to a point. Break the old fixture into pieces remove the stainless guard and get a pair of vice grips on the screw and back them out.
Decided I would do two more before supper. Well so much for that idea, I removed the outer covers and saw what some moron had done. Instead of getting the rusty screws out the way I did the others, this guy drills a 3/16 hole on both fixtures and pop riveted them on… If words could do a job someone out there would be without his balls. I drilled the rivets out and tapped the whole with a 12-24 tap. I also had to drill the holes in the new LED fixtures. If you do this be very carful as the little ground ring could be ripped off while drilling through it.
Only 9 more to go.
-
Steve: It looks like the pop rivets went in the same holes that the two inner screws went into. Did he get the screws out completely, then drill the hole bigger for the pop rivets?
Log in to reply.