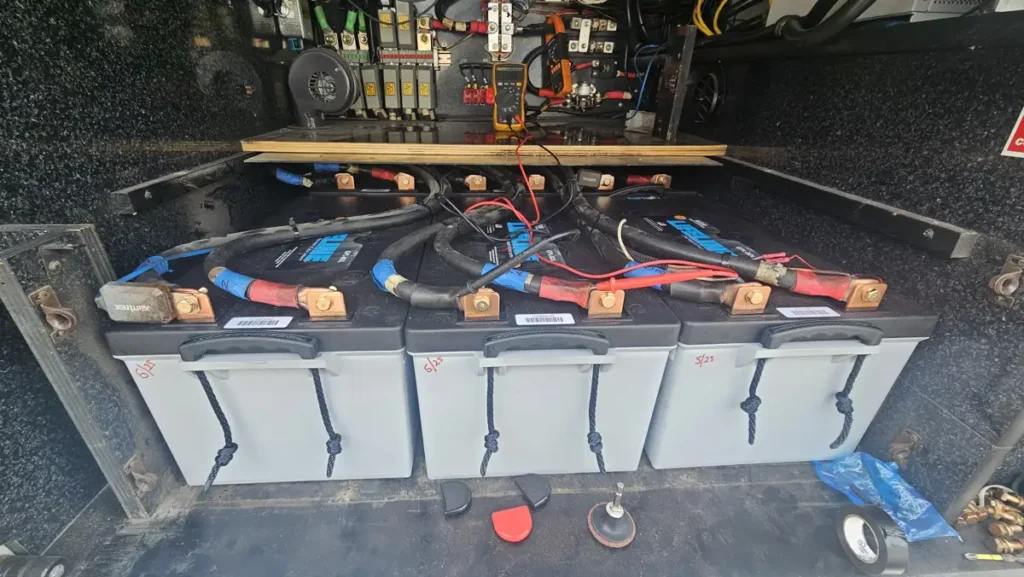
Changing Chassis Batteries

On the forums as well as in emails and phone calls I receive, one of the most common
topics is “MY BUS WILL NOT START”.
That is quickly followed by a mention of just having batteries replaced. Almost all Prevost
coaches typically use 4 Group 31 batteries cabled together in both parallel and series.
(Some few use a pair of 8D batteries) Simply stated connecting a battery’s positive post to
the next battery’s negative post makes a single 12 volt battery into a pair of 12 volt
batteries into 24 volt configuration.
Connecting a pair of 12 volt batteries, positive to positive, negative to negative doubles the
stored capacity, but leaves the battery voltages at 12 volts.
The diagram of how the batteries for the chassis are cabled together is typically on the
passenger (curb) side engine access door. However despite the diagram it is far too
common for people changing a set of batteries to fail to connect them as they were when
the old batteries were removed. To add to the confusion relating to how the batteries were
cabled together is often there are cable or wire connections not shown on the diagram. It
is not unusual to have wires or cables for battery chargers, for power to keep the DDEC
circuits operational, or for other converter requirements.
Because of the potential to mis-wire the new batteries it is important to begin the new
battery installation by making your own diagram of how the batteries are as installed.
Then on the diagram assign a number to the battery posts. It does not matter what
number you assign to each battery post. The next step is to mark each cable end with a
number corresponding to the number you have assigned to the post the cables are
attached to.
Take your time. Make certain before or immediately after removing a cable from a
battery post that each end of every cable is marked with the post number. It is not
uncommon to have smaller gauge wires at the posts in addition to the cables. You do not
have to know why they are at the post, or their function, but you do need to mark them
with the post number just as you did with the large cables. Double check that the
numbers on the cables do in fact match the number you have assigned to the post.
There is a lot of energy stored in the batteries so it is important to respect that as cables
are removed the metal cable end is wrapped with tape to prevent an accidental contact
with the opposite post or posts. You can be assured if you touch a ground cable to a
positive post or cable sparks are going to fly. Insulate the cable ends immediately to
minimize that risk. I always start to remove cables using the negative battery posts.
When all cables are marked and the nuts securing them have been removed from the
posts you can start disassembling the spaghetti of wires from the battery posts. As long as
everything is numbered and the metallic cable ends are insulated you do not have to fear
sparks or an incorrect re-assembly. Insulate or wrap tape over the tools to minimize the
risk of hitting a terminal or opposing battery post.
I have had numerous battery makes over the years, but overall my best performance was
with the use of Delco 1150 sealed lead acid batteries. They never need service and in my
case, at the end of their 5 years in service they still test well and likely would have lasted
longer than the 5 years I decide is their life in my coach.
With the batteries out that is a good time to completely clean the area where the batteries
are located. Typically road dirt tends to get all around where the batteries are mounted so
I wire brush and vacuum the area, and if needed I scrape and repaint areas that are
rusted. If any of the cable ends are corroded or have built up corrosion from outgassing I
scrape and clean the cable ends, using a wire brush, steel wool or both. All cable
connections need to be clean bare metal.
When it is time to install the new batteries make certain every cable that needs to be
reattached is not going to be hidden or behind the new batteries. It is common for a cable
whose end is still attached to the chassis to get behind the installed batteries, and get
missed when attaching cables. If you want to insure everything is connected make a note
of how many cables or wires are attached to each post. Often the root cause of the
batteries not working is one of the cables or wires had slipped down behind the batteries,
out of sight. Knowing the numbers attached to each battery post is all you need to know
because if one has fallen from sight you will know it is missing.
When the batteries are being set in place make sure they are oriented exactly as the old
ones were. After they are set in place secure them in position with whatever bar or hold
down device secured the original batteries. Once the cables are in place it may not be
possible to install the battery hold down I begin the process of reinstalling cables with the positive cables. Following that I reinstall the negative cables. Even with tape insulating the cable ends I still treat everything as if there was no insulation, and I only remove the cable end insulation when the cable is to be attached to the battery post. Until all cables and wires are on their respective posts I only
secure them with nuts, finger tight. This allows for a little movement of the cables if
needed to route the various cables under, over or around other cables. When installing
cables I make certain none of the cables can move or rub other cables or wear away the
cable insulation. If in doubt I wrap the point of potential wear with tape or a suitable
sleeve to prevent wear.
As soon as all cables and wires are in place, but before anything else is set in place to
cover the battery bank I spray each battery post and cable end with battery post
protective compound to prevent corrosion. This prevents the growth of that light green
copper corrosion and protects the entire battery bank from corrosion at the posts.
At that point I check the installation by first verifying each cable is in the right place. This
double and triple check has insured the cables are all connected to the right posts. Then
do an engine start. At this point I verify the batteries will spin the engine over, the engine
will start and that all dash gauges and warning light wires and cables are in the right
place and everything works. At that point I proceed to finish installing everything that
was removed for the project which in my conversion is a plastic cover over the batteries,
and on top of that a cabinet for water hoses, sewer hoses, and spare belts.
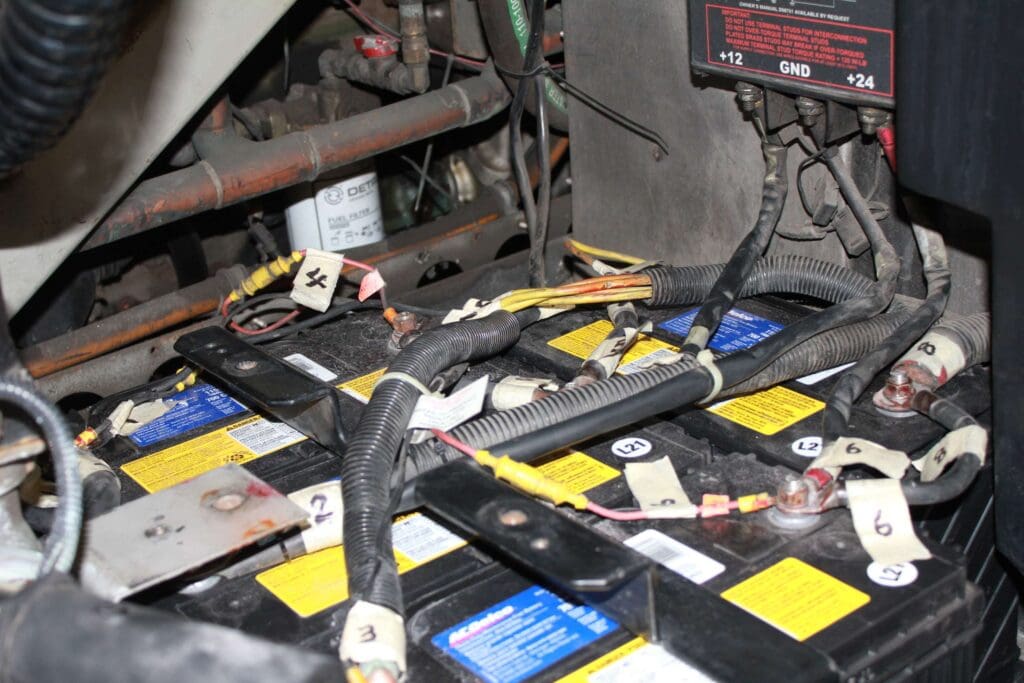
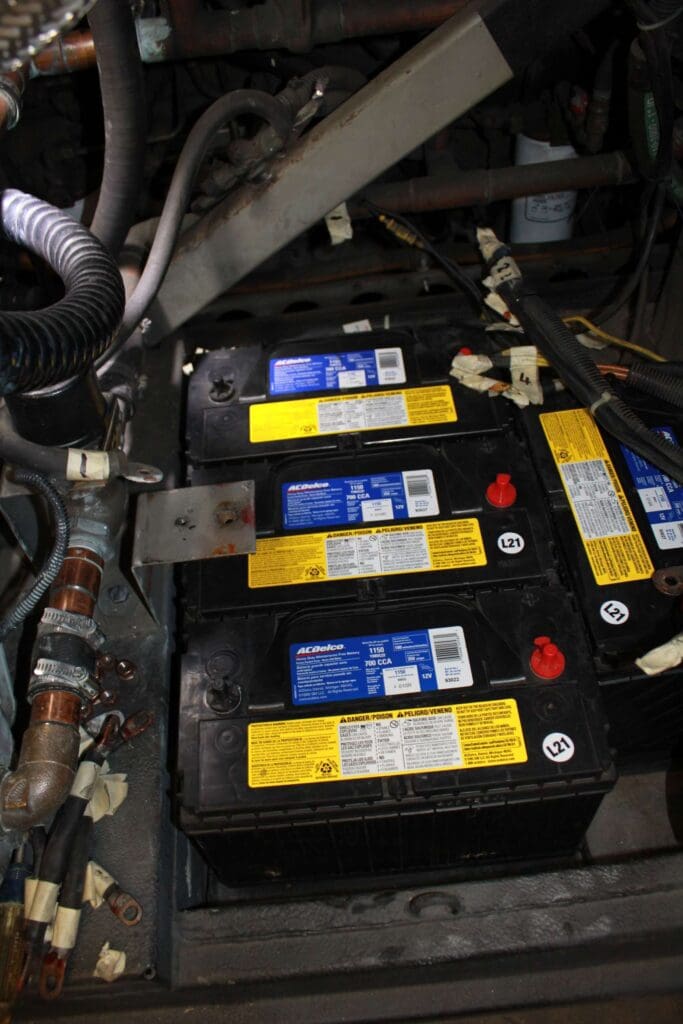
This photo is the start of the project. Take the time to label every cable end so when the
entire battery bank has its cables and wires removed you know where they go when the
new batteries are set in place.
I make a crude sketch and assign a number to every post, and depict the orientation of
the batteries. In the photo above it shows I use masking tape to make a label, but it really
doesn’t matter what you use as long as it is readable even after the cables and wires are
handled during removal and replacement.
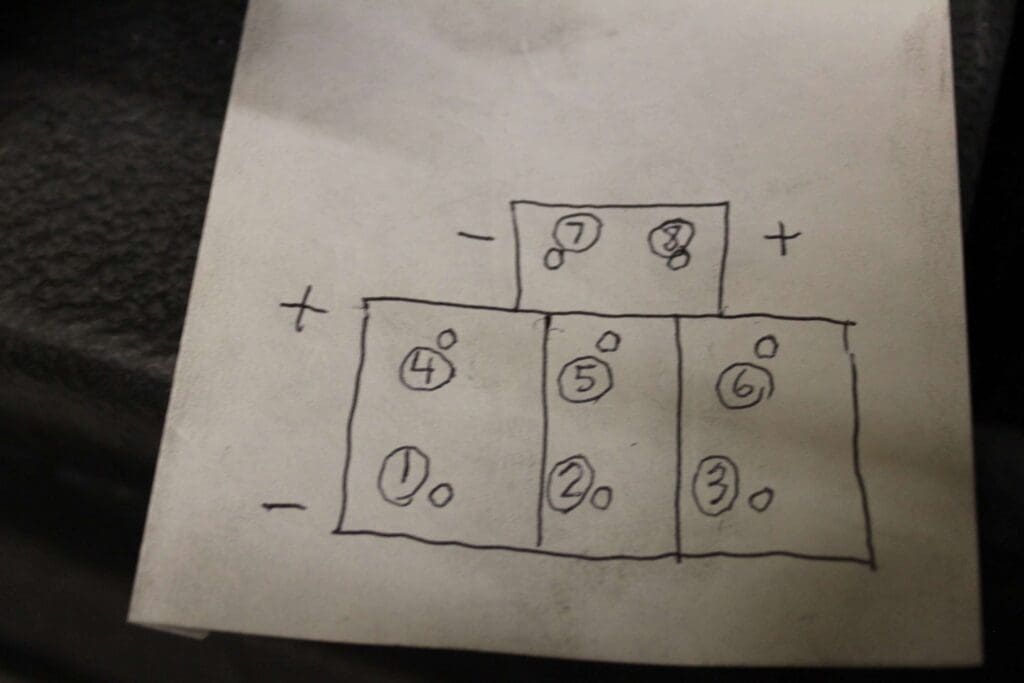
My sketch may be crude, but it is more than adequate.
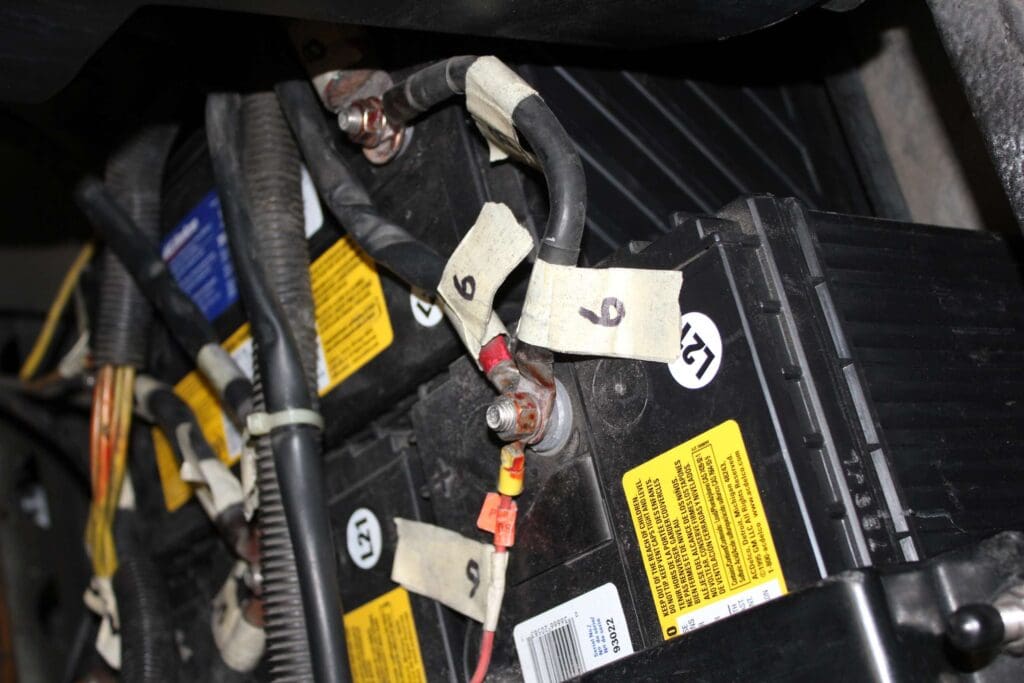
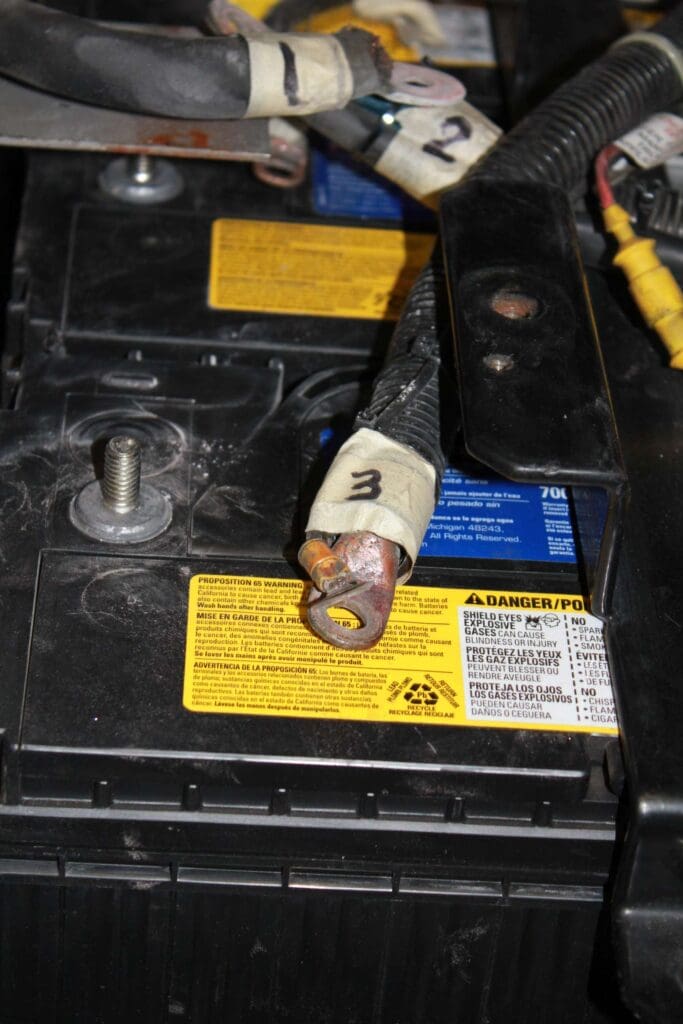
This closeup of the cables and wires shows they are clearly marked so there is no doubt as
to where they go. Additionally I make note of how many wires or cables are attached to
each battery post so if the number of cables and wires that each coach should have does
not agree with the ones available then it is a clear indication something is wrong.
As shown in the next photo I begin by removing all the negative cables and wires. When
the cables and wires are removed I clean the terminals with sandpaper or a wire brush to
insure when reassembled that good electrical contact is made. I inspect the terminal
connections and if all are sound I wrap the terminal with tape to prevent an accidental
short circuit if it connects with any metal terminals or metal parts.
When removing, or installing the negative cables it is common if you see a small spark
because some circuits may have a small current draw.
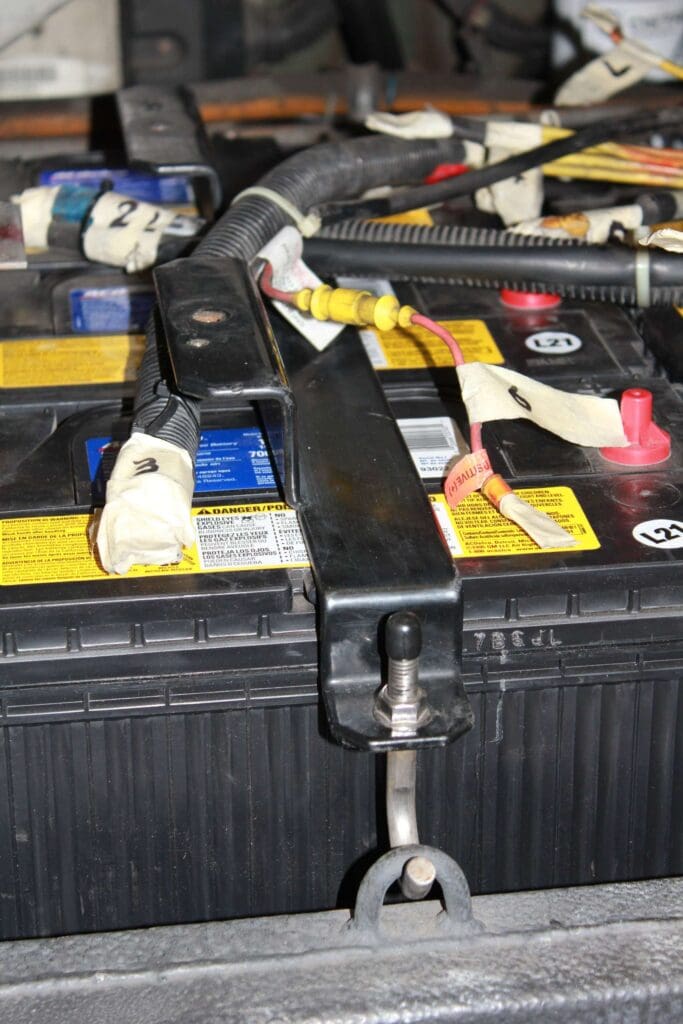
Taping the terminals is not a fancy job. Just cover the bare metal of the terminals.
The next step is to remove any hold down devices so the batteries can be removed. With
the hold down removed it is just a matter of doing the grunt work to lift or slide the
batteries out.
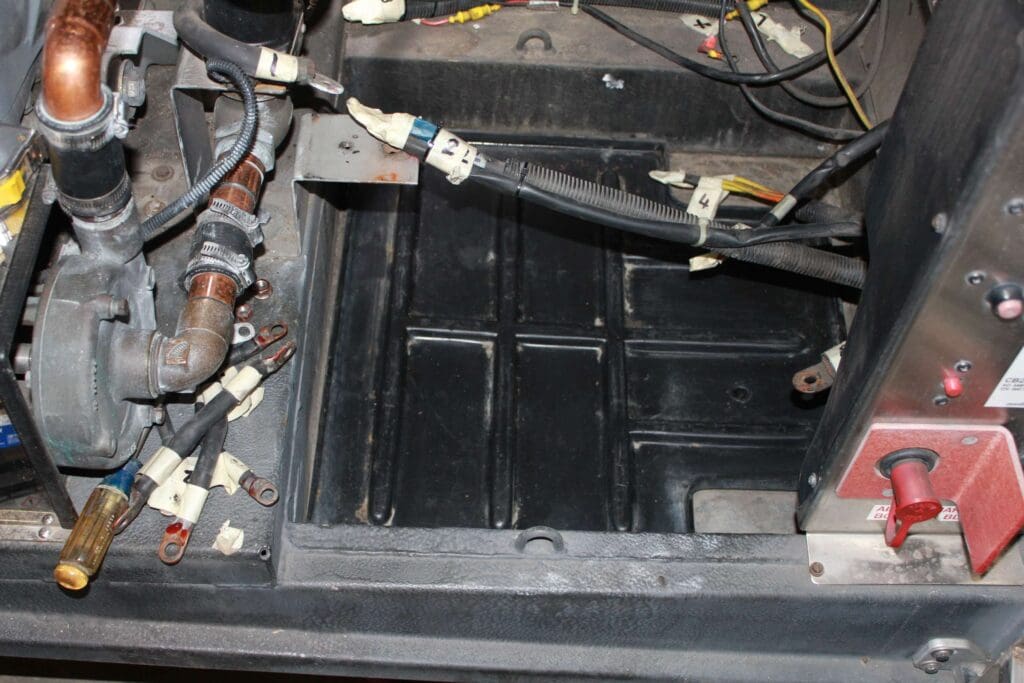
It is likely the place the batteries are mounted is going to collect a fairly large amount of
road dirt. This is an opportunity to clean the mounting area as well as the floor of the
mounting area. If there is any corrosion now is the time to clean up the rust and repaint
the area to prevent further corrosion.
The installation of the new batteries is a simple reverse of the removal process. Double
check the terminals to make sure they are corrosion free and tightly secured to the cable
or wires.
During installation treat every wire or cable terminal as “hot” and refrain from letting
them touch metal or battery terminals other than the ones the terminal goes on. Until all
wires and cables are on their respective posts do not tighten the nuts that secure them. As
you route the cables and wires you may find you want to re-route them so they are not
positioned where they can rub on anything that will wear through the insulation.
Once everything is in place, and all the posts have the correct number of wires and cables
tighten the nuts on the battery posts. Don’t be shy. Make sure the terminals are tightly
secured. Keep in mind when loosening or tightening cables and wires the wrench can
come in contact with metal and you likely will have a short with lots of sparks. It is
possible to literally weld the tool onto the point of contact, blow holes through sheet metal,
or melt a terminal or battery post. Use a lot of caution, even going so far as insulating the
tool to the extent possible with electrical tape.