
-
Pictures of Battery Replacement
Pictures of replacing the batteries in my 1995/96 Prevost XL
I posted this in other forums but thought I should share it here as well. You all have been so helpful to me already so I hope this might be of help to somebody here.
I replaced the starting batteries in my 1995/96 Prevost XL. I received a bunch of help on different forums and I wanted to pass along a description and a few pictures to help others. I am not mechanically inclined and can not tackle most major tasks so if you are in the same boat, take courage. If we are going to own these buses on a budget we must learn to work on a few things. I am living proof that there is hope!
I refer to my bus as a 1995/96 because it is a 1995 Prevost with the conversion completed and the whole thing titled in 1996. I have learned when talking to Prevost to refer to it as a 95 and when discussing the conversion with Vantare owners it is a 96.
In November my batteries were noticeably weakened so I began to make plans to replace them. They were over five years old according to the stickers on them so I figured it was about time. This bus requires four 31 group batteries.
After gathering all the facts and advice I could I jumped in last week and replaced the batteries.
All went well and it cranked beautifully when I was finished. I breathed a sigh of relief and thanked God for his help!
I started by disconnecting the shore power and turning off the inverters.
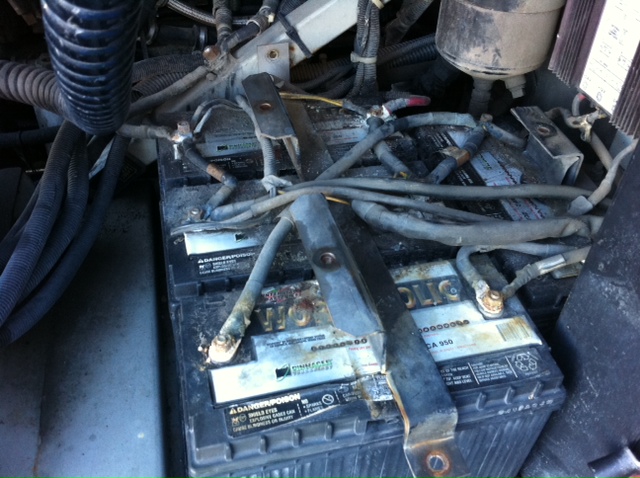

There are four batteries so I numbered the posts 1-8 and marked each wire with a corresponding number as I took it off. Several posts had four wires and all but one had two or more wires. By labeling each wire I wanted to make sure I didn’t mix any up. Even with every wire marked clearly it could have easily been confusing. I would never have wired this up correctly without labeling and detailed notes.

I removed the negative from the first battery and then the positive and then removed the battery. I taped the end of each lead to prevent any sparking. It wasn’t long before all the batteries were removed.
One of them was reading 10.8 volts when I took it out so it was probably the culprit.


The empty battery compartment before I cleaned the area.

I cleaned each lead as I put it on and applied generous amounts of dielectric grease to everything. I installed one battery at a time and put the brace back in place.

After the bus cranked and I was through rejoicing I put the cover and trickle charg (I have since put new mounting bolts on the cover and cleaned it up but this picture was before that.)er back on and the job was finished.

I did not spray any of the red coating on the battery posts because I have not sorted through the conflicting opinions on it yet. Do you use it or recommend it?
I’m thankful for all of the advice I received on this little project.
I hope the pictures and description help somebody else.
Have a blessed day…
DKO

Log in to reply.